Mini Chocolate Cream Tarts
Highlighted under: Fresh Baked
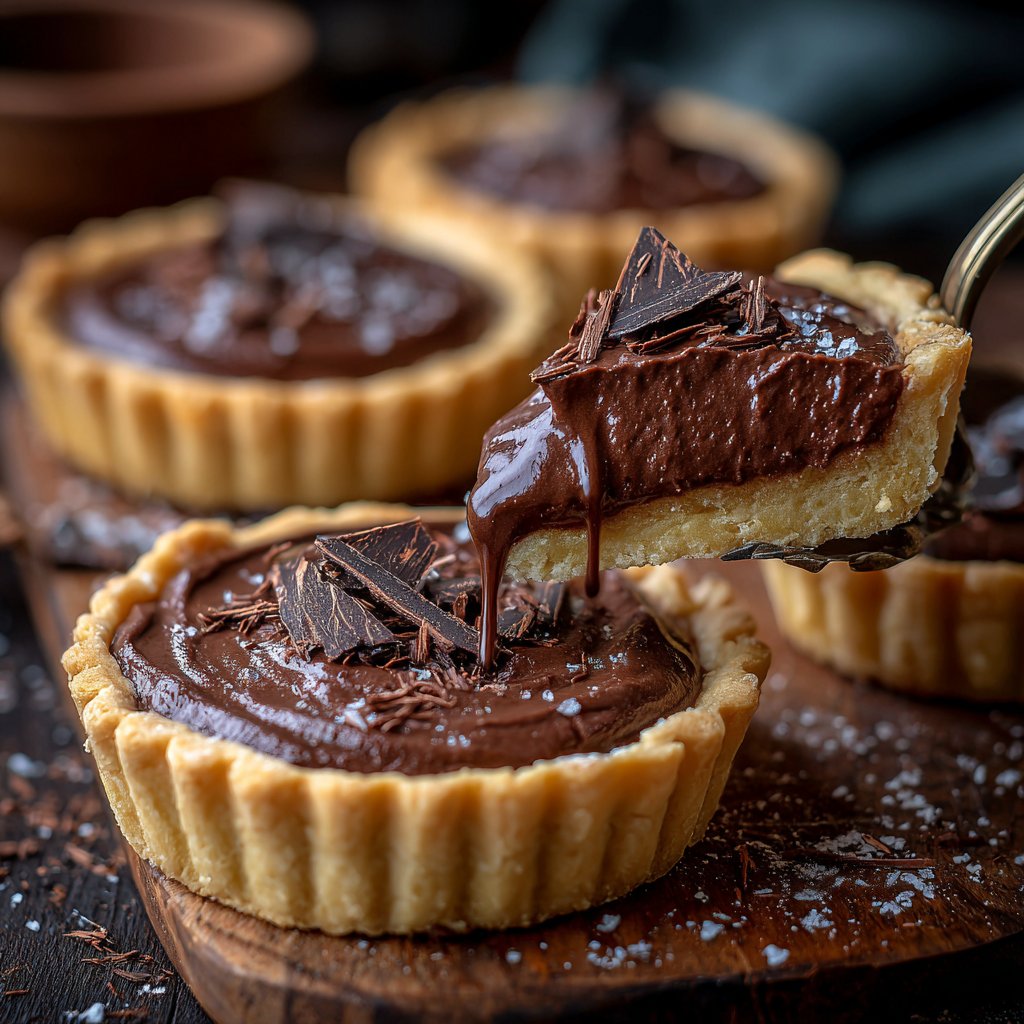
I’ve always loved a good chocolate dessert, but these Mini Chocolate Cream Tarts take it to another level. The rich, velvety chocolate filling nestled in a crispy tart shell makes for an irresistible combination. I first stumbled upon this recipe during a friend’s dinner party, where everyone raved about the bite-sized treats. Now, whenever I make these tarts, I always remember how easy they are to whip up, even if they look sophisticated. Perfect for a gathering or simply treating myself on a cozy evening!
When I first tried making these Mini Chocolate Cream Tarts, I was amazed at how easy it was to achieve such a gourmet dessert. The crispy tart shell holds a luxurious chocolate pastry cream that simply melts in your mouth. Using high-quality dark chocolate really elevates the flavor, and I find that adding a pinch of sea salt to the filling brings out the sweetness beautifully.
One of my favorite tips is to chill the tart shells completely before adding the filling. This keeps the tart crust nice and crisp, ensuring the perfect texture from first bite to last. Enjoying these tarts with a cup of coffee makes for the ultimate indulgent treat!
Why You'll Love These Tarts
- Deliciously smooth chocolate cream that is decadent yet light
- Individual servings make them perfect for any occasion
- The contrast between the crispy shell and creamy filling is simply divine
Mastering the Tart Shells
Creating the perfect tart shell is all about the texture. When mixing the dry ingredients with butter, aim for a sandy consistency, which ensures a flaky crust. You want to see small clumps of butter; this will help create that desired texture when baked. Be careful not to over-mix the dough, as it can become tough. After pressing the dough into the tart pans, use a fork to prick the bottoms. This prevents the shells from puffing up during baking, maintaining that perfect shape.
Baking times can vary slightly based on your oven, so keep an eye on the tart shells. Look for a firm texture and a slight sheen on the edges to ensure they’re not underbaked. If you notice the edges starting to darken too quickly, cover them with strips of foil. Once cooled, the tart shells can be stored in an airtight container at room temperature for up to three days, making them a great make-ahead component.
Creating the Chocolate Filling
When preparing the chocolate filling, using high-quality dark chocolate is crucial as it significantly affects the flavor. A chocolate with 70% cocoa or higher provides a rich, complex taste that perfectly balances with the cream and sugar. Be sure to chop the chocolate into small, even pieces to ensure it melts smoothly when mixed with the hot cream. If you find it’s not melting well, return the mixture to low heat for a couple of minutes but avoid boiling, which can cause the chocolate to seize.
Letting the filling cool slightly before pouring it into the tart shells is essential. This step prevents the heat from melting the tart shells. Aim for a temperature where the filling is still pourable but not so hot that it alters the integrity of the tart crust. If you prefer a sweeter filling, feel free to adjust the sugar to suit your taste, but keep in mind that the chocolate flavor should remain the star of the show.
Serving and Enjoying Your Tarts
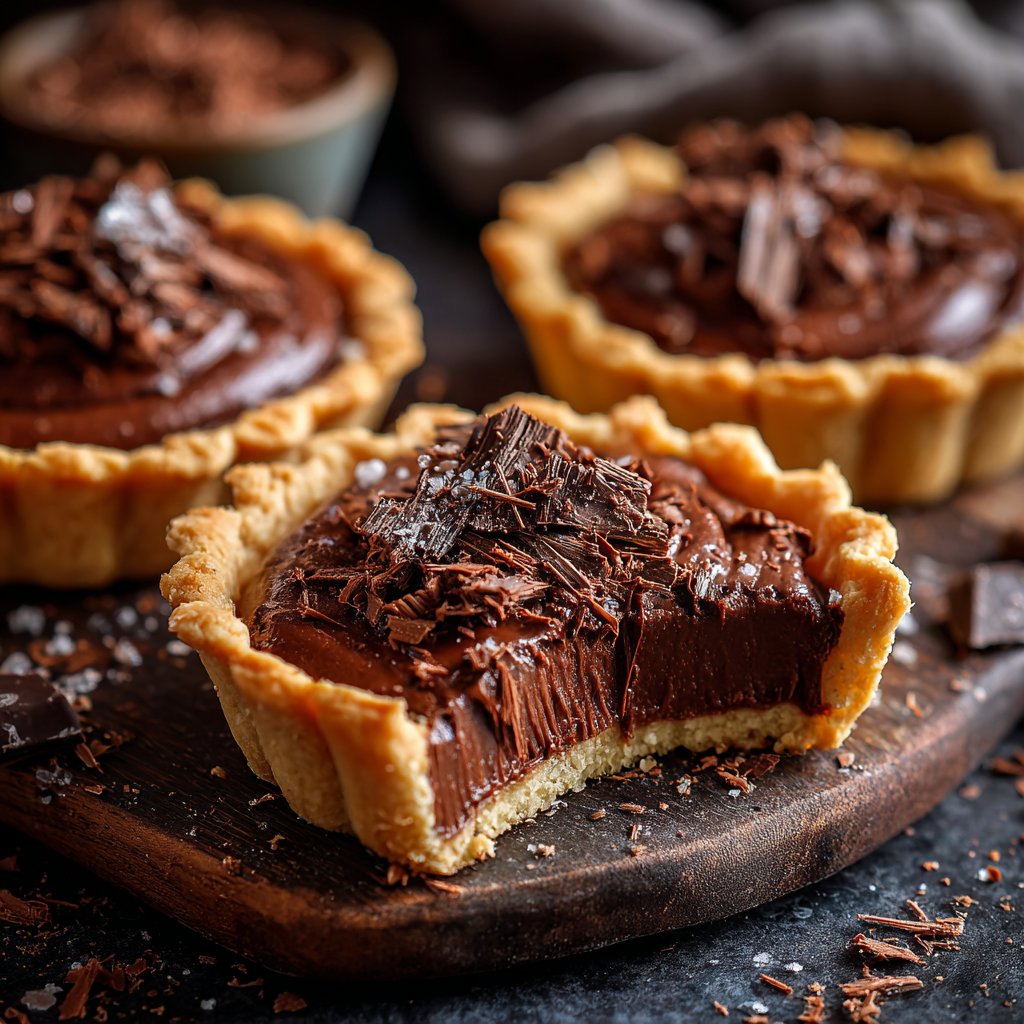
These Mini Chocolate Cream Tarts are a hit when served chilled, allowing the filling to maintain its creamy consistency. Consider garnishing with fresh berries or a mint sprig for a pop of color and freshness. A sprinkle of sea salt can also elevate the chocolate flavor and add an interesting texture contrast. Serve them on a pretty platter, and they'll become the star of any dessert table.
If you have leftovers, these tarts can be stored in the refrigerator for up to five days. While the texture stays delightful, they’re best consumed fresh. To freeze them, wrap the tarts individually in plastic wrap and place them in an airtight container. They can be frozen for up to a month, and you can thaw them in the refrigerator overnight before serving for a quick homemade treat anytime.
Ingredients
Gather the following ingredients to create these delightful mini tarts:
For the Tart Shells
- 1 cup all-purpose flour
- 1/4 cup unsweetened cocoa powder
- 1/4 cup powdered sugar
- 1/2 cup unsalted butter, chilled and cubed
- 1 egg yolk
- 1-2 tablespoons cold water
For the Chocolate Filling
- 1 cup heavy cream
- 8 ounces dark chocolate (70% cocoa or higher), chopped
- 2 tablespoons granulated sugar
- 1 teaspoon vanilla extract
- Pinch of salt
You’re just a few steps away from delicious mini tarts!
Instructions
Follow these simple steps to bring your Mini Chocolate Cream Tarts to life:
Make the Tart Shells
Preheat your oven to 350°F (175°C). In a mixing bowl, combine flour, cocoa powder, and powdered sugar. Add the chilled butter and mix until crumbly. Stir in the egg yolk and just enough cold water to form a dough. Divide the dough into small balls and press each one into the bottom and sides of a mini tart pan. Bake for 12-15 minutes, then let them cool completely.
Prepare the Chocolate Filling
In a small saucepan, heat the heavy cream over medium heat until just simmering. Remove from heat and add the chopped dark chocolate, granulated sugar, vanilla extract, and a pinch of salt. Stir until fully melted and smooth. Allow the mixture to cool slightly.
Assemble the Tarts
Once the tart shells are cooled, pour the chocolate filling into each shell. Smooth the top with a spatula. Refrigerate the assembled tarts for at least 1 hour or until the filling is set.
Serve
Carefully remove the tarts from their pans and serve chilled. Enjoy with a sprinkle of cocoa powder or a dollop of whipped cream on top!
Now, sit back and enjoy your delightful Mini Chocolate Cream Tarts!
Pro Tips
- For an extra flavor boost, consider adding a dash of espresso powder to the chocolate filling. It enhances the chocolate flavor magnificently!
Tips for Perfecting Your Tarts
One common mistake when making tart shells is overworking the dough, which can lead to a tough crust. Always handle the dough as little as possible once combined, just enough to bring it together. Remember to chill the butter thoroughly before starting, as this creates flakiness in the final product. If your kitchen is warm, also consider chilling the assembled tart shells in the fridge for a brief period before baking.
If you want to get creative, consider flavoring the chocolate filling. A splash of espresso or a hint of orange zest pairs beautifully with dark chocolate. Simply add the flavoring when you combine the chocolate with the warm cream for a subtle yet delicious twist.
Ingredient Substitutions
If you're looking for a gluten-free version of these tarts, substituting the all-purpose flour with a gluten-free blend specifically designed for baking can yield great results. Be sure to choose a blend that includes xanthan gum, which helps mimic the texture that traditional flour provides. Likewise, using coconut oil can replace butter, but the flavor will be slightly different—more tropical.
For those aiming to reduce sugar, replacing granulated sugar with a natural sweetener such as honey or maple syrup can work, but you'll want to adjust the quantity based on sweetness levels, as these have different sweetness profiles than granulated sugar.
Scaling the Recipe
Scaling this recipe up for larger gatherings is quite straightforward. Simply multiply the ingredient amounts to fit the number of tarts needed. Ensure that your tart pans are uniform in size, as this consistency will help with even baking. Note that baking times may vary slightly if you choose to make larger tarts, so always check for doneness and adjust as necessary.
Conversely, if you want to make fewer tarts, this recipe can be halved easily, allowing you to enjoy these delights without the temptation of leftovers. Make sure to keep an eye on the baking times, as smaller tarts may bake faster than you anticipate.
Questions About Recipes
→ Can I use milk chocolate instead of dark chocolate?
Yes, milk chocolate can be used, but it will result in a sweeter filling. Adjust the sugar accordingly.
→ How long will the tarts keep?
These tarts can be stored in the refrigerator for up to 3 days. Keep them in an airtight container.
→ Can I freeze these tarts?
Yes, you can freeze the tart shells before filling. Once assembled, it's best to consume within a few days for optimal texture.
→ Can I make the chocolate filling in advance?
Absolutely! The filling can be made a day ahead and stored in the fridge. Just reheat gently before pouring into the tarts.
Mini Chocolate Cream Tarts
Created by: The Chefpaulbakes Team
Recipe Type: Fresh Baked
Skill Level: Intermediate
Final Quantity: 12 tarts
What You'll Need
For the Tart Shells
- 1 cup all-purpose flour
- 1/4 cup unsweetened cocoa powder
- 1/4 cup powdered sugar
- 1/2 cup unsalted butter, chilled and cubed
- 1 egg yolk
- 1-2 tablespoons cold water
For the Chocolate Filling
- 1 cup heavy cream
- 8 ounces dark chocolate (70% cocoa or higher), chopped
- 2 tablespoons granulated sugar
- 1 teaspoon vanilla extract
- Pinch of salt
How-To Steps
Preheat your oven to 350°F (175°C). In a mixing bowl, combine flour, cocoa powder, and powdered sugar. Add the chilled butter and mix until crumbly. Stir in the egg yolk and just enough cold water to form a dough. Divide the dough into small balls and press each one into the bottom and sides of a mini tart pan. Bake for 12-15 minutes, then let them cool completely.
In a small saucepan, heat the heavy cream over medium heat until just simmering. Remove from heat and add the chopped dark chocolate, granulated sugar, vanilla extract, and a pinch of salt. Stir until fully melted and smooth. Allow the mixture to cool slightly.
Once the tart shells are cooled, pour the chocolate filling into each shell. Smooth the top with a spatula. Refrigerate the assembled tarts for at least 1 hour or until the filling is set.
Carefully remove the tarts from their pans and serve chilled. Enjoy with a sprinkle of cocoa powder or a dollop of whipped cream on top!
Extra Tips
- For an extra flavor boost, consider adding a dash of espresso powder to the chocolate filling. It enhances the chocolate flavor magnificently!
Nutritional Breakdown (Per Serving)
- Calories: 250 kcal
- Total Fat: 18g
- Saturated Fat: 10g
- Cholesterol: 70mg
- Sodium: 50mg
- Total Carbohydrates: 20g
- Dietary Fiber: 1g
- Sugars: 10g
- Protein: 3g